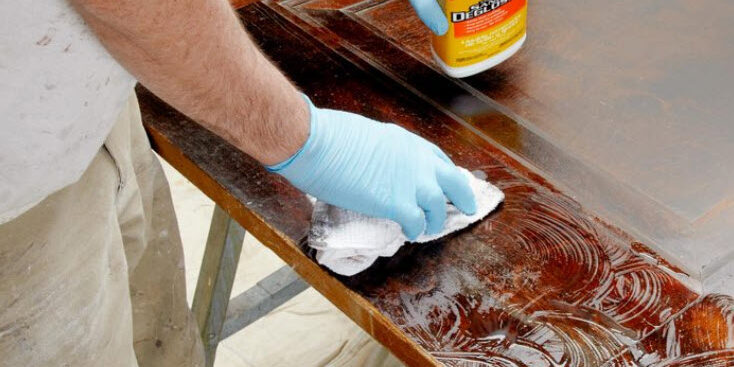
Are you restoring a painted or finished surface? Discover how to simplify prep work with liquid sandpaper.
DIYers love to breathe new life into old materials — things like restoring painted or finished wood furniture, doors or interior trim.
All these projects start with surface prep. Traditionally, this process involves sanding off the paint or poly completely, or at the very least scuffing it up so the new material adheres properly. Both options are labor-intensive and messy.
Luckily, if you only need to scuff the surface, there is an alternative. Minimize the fuss and eliminate the dust with liquid sandpaper.
What Is Liquid Sandpaper?
Liquid sandpaper is a chemical substitute for hand sanding. Sometimes called liquid deglosser, it preps the surface by softening the existing finish so it holds a new coat of paint or sealer.
While the exact ingredients vary by manufacturer, all liquid sandpaper is essentially a paint stripper. It’s diluted to a point where it will soften the finished surface without weakening it so much that it comes off completely.
It’s important to note liquid sandpaper does not remove material the way traditional sanding does. It won’t fix gouges or scratches, and it won’t erase the color from stained wood. It lets new paint and stain adhere. Period.
What Is Liquid Sandpaper Used For?
Liquid sandpaper is popular with DIYers restoring furniture that just needs a new coat of paint. It’s particularly useful for furniture or interior trim with intricate curves and details since it can be brushed into nooks and crannies that traditional sandpaper can’t reach.
Because there’s no universal formula, products from different manufacturers might be better for removing gloss on specific materials. Always read the manufacturer’s instructions to see if any given product is the right choice for your project.
Pros and Cons of Liquid Sandpaper
Like any tool, liquid sandpaper/deglosser has its strengths and weaknesses, and understanding them is key to making an informed purchase.
Pros
- Less elbow grease: With liquid sandpaper, you apply it and let the chemicals do the work. Easy. While there is a fair amount of wiping on and off, it’s far less effort than traditional sandpaper, especially on curved or recessed surfaces.
- Less dust: Sandpaper generates dust, creating a mess and requiring additional cleaning with tack cloths or a shop vacuum. There’s none of that with liquid sandpaper.
- Reaches intricate surfaces: Liquid sandpaper can find its way into hard-to-reach areas. Combined with a small brush, it can be worked into almost any detail you encounter.
- Not designed to remove materials: Liquid sandpaper may remove some finish material, but it’s a minimal amount — only enough to take off the gloss surface. That makes it valuable on thin or delicate materials like wood veneer that can easily be sanded through.
Cons
- Fumes: All liquid sandpaper gives off fumes, so it should only be used in well-ventilated areas or with a respirator.
- Environmental concerns: The toxic nature of the ingredients means liquid sandpaper is less environmentally friendly than traditional sandpaper. Always refer to the manufacturer’s instructions for usage and disposal.
- Not designed to remove materials: Imperfections on a surface will still be present after you use liquid sandpaper. Smooth out any damaged areas with traditional sandpaper before deglossing the surface with liquid sandpaper.
How To Use Liquid Sandpaper
You’ll need solvent-resistant gloves, brushes, rags and a well-ventilated area or a respirator. Refer to the manufacturer’s instructions for specifics, but this is a good overview.
- Start by selecting a work area that can get a little wet, such as a garage, or by laying down plastic dropcloth. If it’s next to spaces you want to protect, tape them off. It’s always better to spend a few minutes protecting surfaces than dealing with clean-up later.
- Wash the surface to be deglossed with dish soap and water, then allow it to dry. This is especially important with kitchen cabinets, which tend to build up grease. For especially grungy surfaces, save time by going with a more aggressive cleaner like TSP or a TSP substitute.
- Apply the liquid sandpaper. Spread it across flat surfaces with a rag or large brush, then work it into recessed areas with a smaller brush.
- Give it time to soften the surface. This will vary by product, so refer to the manufacturer’s instructions for exactly how long.
- Once it’s ready, wipe down the surface with a fresh rag. Some deglossers require a wipe-down with a damp cloth to deactivate them, while others can be removed with a dry rag. (Be sure to clean out any recessed areas with a clean brush.)
- Apply primer, paint or a fresh coat of finish. Again, refer to the manufacturer’s instructions. Some products have a limited window of time to apply the new paint, while others do not.
- Dispose of the used rags or brushes appropriately. Some liquid sandpapers include chemicals that can pose a combustion hazard if the used rags aren’t allowed to dry thoroughly. Refer to the manufacturer’s instructions for guidance.
Where To Buy Liquid Sandpaper
Look for liquid sandpaper online or in retail locations where paint and finishing supplies are sold.

